
Blog
Petal Brush Face Painting: 2026 Professional Guide
What if the secret to doubling your speed and your hourly rate wasn’t just more practice, but mastering a single, teardrop-shaped tool? You’ve likely felt the frustration of muddy colors when loading your bristles or the panic of flowers looking flat while a long line of excited kids waits at a busy birthday party. It’s discouraging when your tools splay or lose their shape just when you need them most. At Lets Paint Face Painting School, we believe that learning how to use a petal brush for face painting is the ultimate game-changer for your artistic journey.
We’re here to help you master this “speed-painting engine” so you can create perfect 5-petal flowers in under 10 seconds with the precision of a seasoned pro. Whether you’re a beginner or looking to refine your technique for the 2026 event season, this guide will empower you to work faster and smarter. You’ll learn the technical nuances of loading split cakes, maintaining your brush’s integrity, and using this versatile tool for far more than just simple floral designs.
Key Takeaways
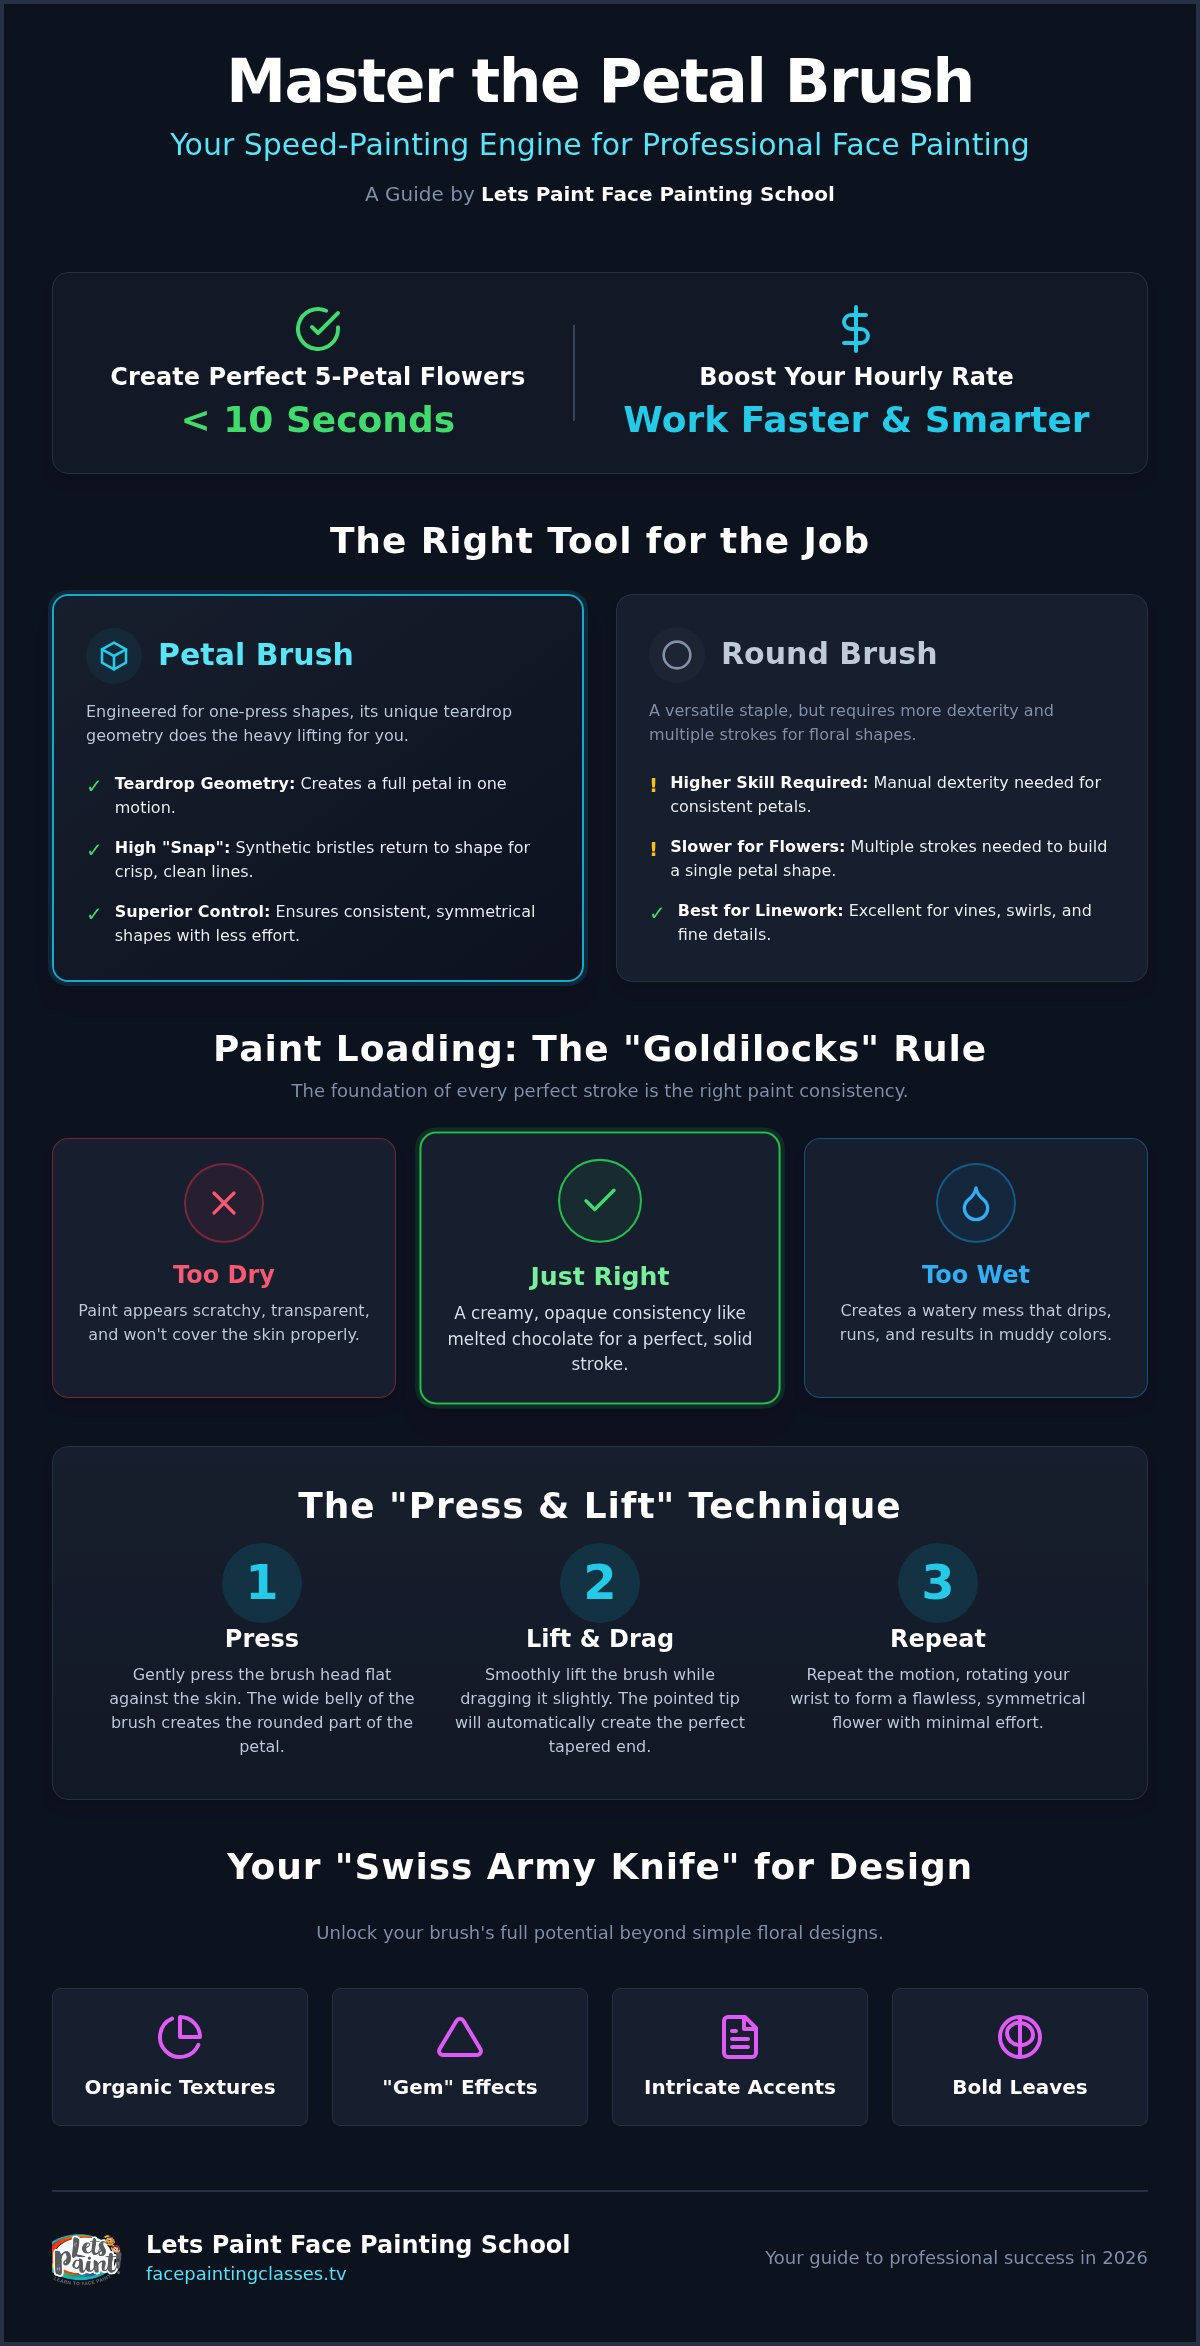
- Discover why the unique teardrop geometry of this tool is a total game-changer for your kit’s speed and efficiency.
- Master the “Goldilocks” rule for water activation to learn exactly how to use a petal brush for face painting without the frustration of muddy colors.
- Perfect the “Press and Lift” technique to create flawless, symmetrical 5-petal flowers in under 10 seconds.
- Unlock the versatility of your brush by using it as a “Swiss Army Knife” to create organic textures and intricate non-floral accents.
- Boost your professional profitability at 2026 events by replacing slow line work with high-impact, one-press gestures.
Understanding the Petal Brush: Anatomy and Purpose in 2026
The petal brush is a precision tool featuring a tapered, teardrop-shaped head specifically engineered for one-press shapes. Unlike standard brushes that require multiple strokes to build a form, the petal brush uses its unique geometry to create a complete petal or leaf in a single movement. As we look at the long history of face painting, tools have evolved from simple sticks to these highly specialized instruments that allow for incredible speed. Understanding how to use a petal brush for face painting starts with recognizing that the brush does the heavy lifting for you. It’s the ultimate “speed-painting engine” in your 2026 professional kit.
In a high-pressure environment like a festival or a corporate event, your choice of bristles matters immensely. You’ll want to reach for high-quality synthetic bristles rather than natural hair. Modern synthetics are designed with a specific “snap” that’s essential for working with water-activated face paints. This snap refers to the brush’s ability to return to its original teardrop shape immediately after you lift it from the skin. Without this resilience, your flowers will look messy and your workflow will slow down. At Lets Paint Face Painting School, we believe that mastering your tools is the first step toward turning your creative passion into a profitable business.
Choosing the Right Petal Brush Size
Size selection is a strategic choice that dictates the impact of your design. Mini and small petal brushes are your go-to for delicate work, such as accents around the eyes or creating “gem” effects that mimic the facets of jewelry. These smaller tools offer surgical precision for intricate details. On the other hand, large or “blooming” brushes are designed for bold focal points. Use these for large cheek flowers or forehead crowns where you want the design to pop from a distance. When shopping for these tools, test the “spring” of the head. A high-quality brush should feel firm yet flexible, allowing you to control the width of the petal simply by varying your hand pressure.
The Difference Between Petal and Round Brushes
While a round brush is a versatile staple, it requires a higher level of manual dexterity to create consistent floral shapes. The petal brush differs in its geometric profile; it has a distinct pointed tip and a wide, rounded belly. This specific shape provides more consistent results for beginners because the brush head itself acts as a stamp. While a round brush is excellent for swirling linework, the petal brush offers superior control for repetitive shapes. You’ll find that switching to a petal brush for your primary floral elements allows you to maintain symmetry with much less effort. Use the round brush for the fine vines and dots, but let the petal brush handle the structural beauty of the flower.
How to Load and Prep Your Petal Brush for Perfect Strokes
Loading your brush is the foundation of every stroke you’ll make. If your paint consistency is off, even the most expensive tool won’t save your design. We follow the “Goldilocks” rule here: your bristles should be wet enough to move the paint but never dripping. If the brush is too dry, the paint will appear scratchy and transparent. If it’s too wet, you’ll end up with a watery mess that runs down your model’s face. To wake up your water-activated paints, use a spray bottle to lightly mist the surface or dip only the tip of your brush into clean water. Professionalism starts with safety, so always ensure you are using products that meet FDA safety regulations for face paint to protect your clients and your business reputation.
When you’re learning how to use a petal brush for face painting, maintaining the brush’s teardrop shape during the loading process is vital. Don’t mash the bristles into the cake. Instead, use a gentle, rhythmic motion. A common mistake is over-loading the “heel”, the part closest to the metal ferrule, while leaving the tip dry. This causes the brush to splay and lose that crisp point you need for sharp petals. At Lets Paint Face Painting School, we teach students to load with intention, ensuring the paint sits on the surface of the bristles rather than being buried deep in the brush head.
Loading for Single-Color Petals
To get a solid, opaque color, use a circular loading technique. Swirl your brush on the paint cake, making sure the bristles are saturated from the belly to the tip. Before you touch the skin, wipe the very edge of your brush on the side of the container. This removes excess moisture and ensures a razor-sharp edge for your stroke. Always test the consistency on the back of your hand. If the paint looks creamy like melted chocolate, you’re ready to go. This simple check prevents “ghosting” where the paint is too thin to cover the skin properly.
The Two-Tone Loading Technique
This is where the magic happens. To create a 3D effect without extra work, load the “belly” of the brush with a lighter color first. Then, carefully dip just the tip into a darker shade or a different part of a split cake. This creates instant dimension in every petal. To keep your colors vibrant, avoid over-mixing on the cake itself. If you find your colors turning muddy, it’s usually because there’s too much water on the brush or you’ve dragged the brush too far across the cake. Mastering these gradients is a core part of our One Stroke Face Painting Techniques, which helps you achieve professional results in half the time. By keeping your colors separated on the bristles, you create flowers that truly pop with depth and light.
Master the Basic Petal Stroke: Step-by-Step Techniques
Once you’ve achieved that perfect “creamy” paint consistency discussed in our loading guide, you’re ready to master the physical movement. Learning how to use a petal brush for face painting effectively relies on a technique we call the “Press and Lift” method. This isn’t like using a traditional round brush where you pull a line to create a shape. Instead, you’re using the brush’s own geometry as a stamp. To get the cleanest, sharpest points, your angle of entry is everything. You must hold the brush at a strict 90-degree angle to the skin. This perpendicular position allows the bristles to splay outward evenly from the center, creating a perfectly symmetrical teardrop shape every single time.
Your hand pressure determines the character of each petal. A firm, confident press creates a wide, “blooming” petal, while a light touch produces a delicate, thin leaf. Mastering how to use a petal brush for face painting means understanding this sensitivity. It’s a rhythmic process: press, pause for a fraction of a second, and lift straight up. As you practice, you’ll develop the muscle memory needed to fly through designs during busy events. Professionalism also means safety, so always ensure your workspace follows established health and hygiene guidelines to keep your kits clean and your clients safe.
The Classic 5-Petal Flower
Symmetry is the hallmark of a pro. To achieve this, visualize a tiny “anchor point” in the center of your design. Place your first petal at the 12 o’clock position. From there, you can work clockwise or use a “cross” pattern; placing petals at 12, 6, 3, and 9 o’clock before filling in the gaps. At Lets Paint Face Painting School, we suggest practicing both directions to see which feels more natural for your hand. Finish the design with a quick center dot using a round brush or a finger dauber to pull the whole look together and hide where the points meet.
Layering Petals for 3D Depth
Once you’re comfortable with basic shapes, you can start building dimension. Layering is the secret to complex designs like pansies or cabbage roses. Start with your outer, darker petals first. Once those are slightly dry, press a second layer of smaller, lighter petals toward the center. The key is to avoid “paint lift.” Don’t scrub the brush; a single, decisive press is all you need to lay down new color without disturbing the layer beneath. This contrast between inner and outer tones creates a stunning 3D effect that looks like it took much longer than it actually did.
Beyond Flowers: Creative Textures and Designs
Think of your petal brush as the “Swiss Army Knife” of your professional kit. While it’s famous for florals, its utility extends far into the world of organic textures and abstract shapes. Once you understand the physics of the bristles, you’ll see opportunities to use it in almost every design. Mastering how to use a petal brush for face painting allows you to move beyond the garden and into the wild, creating everything from dragon scales to sweeping tiger stripes with the same tool. At Lets Paint Face Painting School, we encourage our students to experiment with the brush’s edge and belly to discover these hidden capabilities.
The beauty of this tool lies in its ability to mimic nature’s imperfections. By varying your hand movement, you can transition from a rigid stamp to a fluid, sweeping motion. This versatility is exactly why professional artists rely on it to maintain high speed without sacrificing the artistic “wow” factor. You can see how these techniques bring life to various animal face painting designs by allowing for quick, textured details that would take much longer with a standard round brush.
Crafting Leaves and Foliage
To create realistic leaves, try the “Wiggle and Drag” technique. Instead of a simple press, give the brush a slight shimmy as you push it into the skin, then drag it toward the stem. This creates a serrated, organic edge that looks much more lifelike than a flat stamp. When you pair a green split cake with your petal brush, you get instant highlights and shadows in a single stroke. You can also use the very tip of the brush to pull out long, sweeping vines. This method is a core component of our One Stroke Face Painting Techniques, which you can master at Lets Paint Face Painting School to elevate your professional portfolio.
Creating Scales and Animal Textures
The “Stamping” method is your best friend for fantasy designs. By overlapping your presses in a brick-like pattern, you can create a field of dragon or mermaid scales in seconds. The teardrop shape of the brush head provides a natural rounded bottom for each scale. You can also use the brush to define the outer edges of butterfly wings, giving them a soft, ruffled appearance. For those just starting out, these textures are covered in our guide on face painting for beginners. You can even create short, flicked strokes to simulate fur textures on feline or canine designs, adding a layer of professional polish that sets your work apart from the competition.
Efficiency and Speed: Integrating Petal Brushes into Professional Gigs
In the professional world, time is your most valuable currency. When you’re working a high-volume corporate event where rates can reach over $250 per hour, your ability to manage a line is what defines your success. An experienced face painter can often paint 15 to 20 full faces per hour, while those relying solely on traditional line work might only manage half that. Mastering how to use a petal brush for face painting is the most effective way to bridge that gap. By using the brush’s geometry to “stamp” designs, you’re essentially replacing minutes of tedious detail work with seconds of high-impact artistry. This efficiency doesn’t just make the kids happy; it makes your business more profitable.
Managing your kit effectively is the next step in professional growth. To maintain a fast pace, keep three or four petal brushes loaded with different color combinations. This allows you to switch from a pink princess flower to a blue frozen star without stopping to wash your bristles. Between clients, hygiene remains paramount. Following strict sanitation protocols is a non-negotiable standard in 2026. Use a high-quality brush soap and a cosmetic-grade sanitizer to ensure your tools remain clean and the synthetic bristles keep their essential “snap” for years. If you’re looking to scale your operations, you’ll find more technical advice in our guide on how to start a face painting business.
Speed-Painting Strategies for 2026 Events
The “2-Minute Butterfly” is a classic example of a line-buster design. By using a large petal brush for the wing accents and a smaller one for the floral crown, you create a complex, multi-layered look in a fraction of the time. These high-impact, low-time designs are essential for festivals where the crowd never seems to end. Additionally, consider the ergonomics of your tools. Because the petal brush relies on a simple press-and-lift motion, it significantly reduces the repetitive wrist strain associated with intricate swirls and twirls. This allows you to work longer sets without the hand fatigue that often plagues professional artists during the busy summer season.
Mastering the Craft with Lets Paint Face Painting School
At Lets Paint Face Painting School, we’re dedicated to helping you turn your creative spark into a thriving career. Our “The Ultimate Face Painting Course” provides the structured framework you need to refine your technical skills and build a professional portfolio. For those ready to dive deeper into specialized tools, our “One Stroke Face Painting Techniques” course offers a dedicated module for petal brush experts. You’ll join a global community of artists where you can receive professional feedback on your floral work and stay updated on the latest industry trends. We believe that with the right mentorship, the journey from a casual interest to professional success is one of the most rewarding paths you can take.
Elevate Your Creative Journey Today
Mastering your tools is the bridge between a casual hobby and a thriving professional career. By understanding how to use a petal brush for face painting, you’ve unlocked a speed-painting engine that allows you to deliver high-impact designs with incredible precision. You now know that this teardrop-shaped wonder is your “Swiss Army Knife” for everything from delicate 3D florals to intricate animal textures. Implementing these efficiency strategies will help you manage long lines with confidence while maintaining the highest hygiene standards for your 2026 events.
Are you ready to transform your passion into a profitable business? You can enroll in The Ultimate Face Painting Course at Lets Paint Face Painting School to master pro techniques. With step-by-step video tutorials led by Maria Mitchell, you’ll join a vibrant global community of over 5,000 students. You’ll also learn the essential business secrets needed to build a profitable painting career that stands out in a competitive market. Your artistic potential is truly limitless. We can’t wait to see the stunning work you’ll create as you move from curiosity to commitment. Let’s start painting your future today.
Frequently Asked Questions
Is a petal brush better than a round brush for flowers?
A petal brush is superior for speed and shape consistency because its teardrop geometry acts as a natural stamp. While a round brush requires manual control to taper each stroke, the petal brush creates a perfect petal in a single press. It’s the ideal choice for beginners who struggle with symmetry. However, you’ll still want your round brush for the fine dots, swirls, and intricate linework that complete a professional design.
Can I use a petal brush with any brand of face paint?
You can use a petal brush with any professional brand of water-activated face paint. The key is ensuring the paint is cosmetic-grade and compliant with current safety regulations. These brushes perform best with high-pigment waxes or glycerin-based cakes that allow for a creamy load. At Lets Paint Face Painting School, we recommend testing how different brands interact with the brush’s “snap” to find your personal preference for floral work.
How do I stop my petal brush from getting ‘muddy’ when using two colors?
To prevent muddy colors, you must maintain a dry “belly” and only wet the tip of the brush. Muddying happens when excess water allows the two colors to bleed together on the bristles. Learn how to use a petal brush for face painting by loading the lighter color first, then carefully dipping just the tip into the darker shade. This technique keeps the transition crisp and ensures your 3D effects stay vibrant and distinct.
What size petal brush is best for a beginner’s kit?
A medium-sized petal brush, often labeled as a “small” or #4, is the most versatile choice for a beginner’s kit. This size is large enough to create impactful cheek flowers but small enough for delicate eye designs. As you gain confidence, you can add a “blooming” brush for larger forehead focal points. Starting with one reliable medium brush allows you to master the “press and lift” technique before expanding your toolset.
How often should I clean my petal brush during a long event?
You should rinse your brush in clean water between every single client to maintain hygiene standards. If you notice your colors are becoming dull or the bristles feel “gummy” from paint buildup, it’s time for a quick swish in brush soap. Maintaining a clean tool ensures the synthetic bristles keep their shape. Proper maintenance is a core habit we emphasize in our professional courses at Lets Paint Face Painting School to ensure equipment longevity.
Can I use a petal brush for teardrops and swirls?
You can certainly use a petal brush for teardrops, as its natural shape is already a teardrop. For swirls, you’ll need to use the sharp tip of the brush rather than the full belly. While it’s possible to create these elements, most professionals prefer a round brush for fluid linework. Understanding how to use a petal brush for face painting in creative ways simply adds more “Swiss Army Knife” utility to your professional kit.
Why is my petal brush losing its shape or splaying?
Splaying often occurs if you’re pressing the brush too hard into the paint cake or the model’s skin. Over time, this forces the bristles outward, damaging the tapered point. It can also happen if the brush is left sitting tip-down in a water cup. To protect your investment, always store your brushes horizontally or bristles-up. High-quality synthetic brushes are resilient, but they still require gentle handling to maintain their professional “snap.”
Are synthetic petal brushes better than natural hair ones for face painting?
Synthetic brushes are the industry standard because they provide the necessary “snap” and spring for water-activated makeup. Natural hair brushes tend to become floppy when wet, making it difficult to achieve the crisp edges required for floral petals. Synthetics are also easier to sanitize and don’t harbor bacteria as easily as porous natural fibers. Using high-quality synthetic tools is a key step toward achieving the professional excellence we teach at Lets Paint Face Painting School.
